Classic Homemade White Bread
Baking bread at home is one of the most satisfying kitchen activities. There is something deeply comforting about the aroma of freshly baked bread filling your home. The soft texture, the golden crust, and the warmth of bread right out of the oven make it one of the most versatile staples in any household. Today, we are going to explore a classic recipe for homemade white bread that is simple, reliable, and perfect for any meal.
Why Homemade Bread is Worth It
Store-bought bread is convenient, but it often contains preservatives, additives, and sometimes ingredients you might not even recognize. Homemade bread allows you to control every ingredient, ensuring freshness and quality. The process itself is also therapeutic. Kneading dough, watching it rise, and finally baking it can be incredibly rewarding.
Another benefit is that homemade bread is highly versatile. You can enjoy it with breakfast, use it for sandwiches, accompany it with soups and stews, or simply eat it with butter. It’s a blank canvas that enhances every meal.
Ingredients You Will Need
For this recipe, you will need common kitchen staples. Here’s what you will need:
- 5 cups warm water
- 1/2 cup white sugar
- 4-6 tablespoons of oil (vegetable or canola works well)
- 1/2 cup warm water (for yeast mixture)
- 1 teaspoon white sugar (for yeast mixture)
- 1 tablespoon active dry yeast
- Approximately 12 cups all-purpose flour
- 1 tablespoon salt
Step 1: Preparing the Yeast
Yeast is a crucial ingredient that makes your bread rise. Start by dissolving 1 teaspoon of sugar in 1/2 cup of warm water. The water should be warm, not hot, ideally around 100–110°F (37–43°C). Sprinkle the yeast over this mixture and stir gently. Allow it to sit for a few minutes until it becomes foamy and rises well above the top of the cup. This indicates that the yeast is active and ready to use.
Step 2: Mixing the Dough
In a large mixing bowl, combine 5 cups of warm water, 1/2 cup of sugar, and 4–6 tablespoons of oil. Stir until the sugar is dissolved and the ingredients are evenly combined. Then, add your activated yeast mixture to this bowl and mix thoroughly.
Next, gradually add the all-purpose flour and salt. Start with about 10 cups of flour and mix until a dough begins to form. Continue adding flour until the dough is no longer sticky and has a smooth, elastic texture. You will likely use around 12 cups, but always adjust based on the dough’s consistency. The dough should be soft but not sticky to the touch.
Step 3: Kneading the Dough
Kneading develops the gluten in the dough, giving your bread structure and texture. Turn your dough onto a floured surface and knead it for about 10 minutes. The dough should stretch without tearing and feel elastic. If it’s too sticky, sprinkle a little more flour, but avoid adding too much, as it can make the bread dense.
Step 4: First Rise
Once kneaded, place the dough in a large, greased bowl. Cover it with a clean kitchen towel or plastic wrap. Let it rise in a warm, draft-free area for about 1 hour, or until it has doubled in size. This first rise is crucial, as it allows the yeast to ferment, creating air pockets that make the bread light and fluffy.
Step 5: Preparing the Pans
While the dough is rising, grease your bread pans with a little oil or butter to prevent sticking. Once the dough has doubled in size, punch it down gently to release excess air. Divide it into portions if you are using multiple pans and shape it to fit your loaf pans.
Step 6: Second Rise
Place the shaped dough into the prepared pans and cover them again. Let the dough rise for another hour. During this time, the dough should puff up again, getting ready for baking. Preheat your oven to 400°F (200°C) during the last 15 minutes of this rise.
Step 7: Baking the Bread
Bake the bread in a preheated oven at 400°F for the first 5 minutes. This initial high heat helps set the crust. Then, reduce the temperature to 350°F (175°C) and continue baking for about 50 minutes, or until the bread is golden brown and sounds hollow when tapped on the bottom. If you have a thermometer, the internal temperature should reach around 190–200°F (88–93°C).
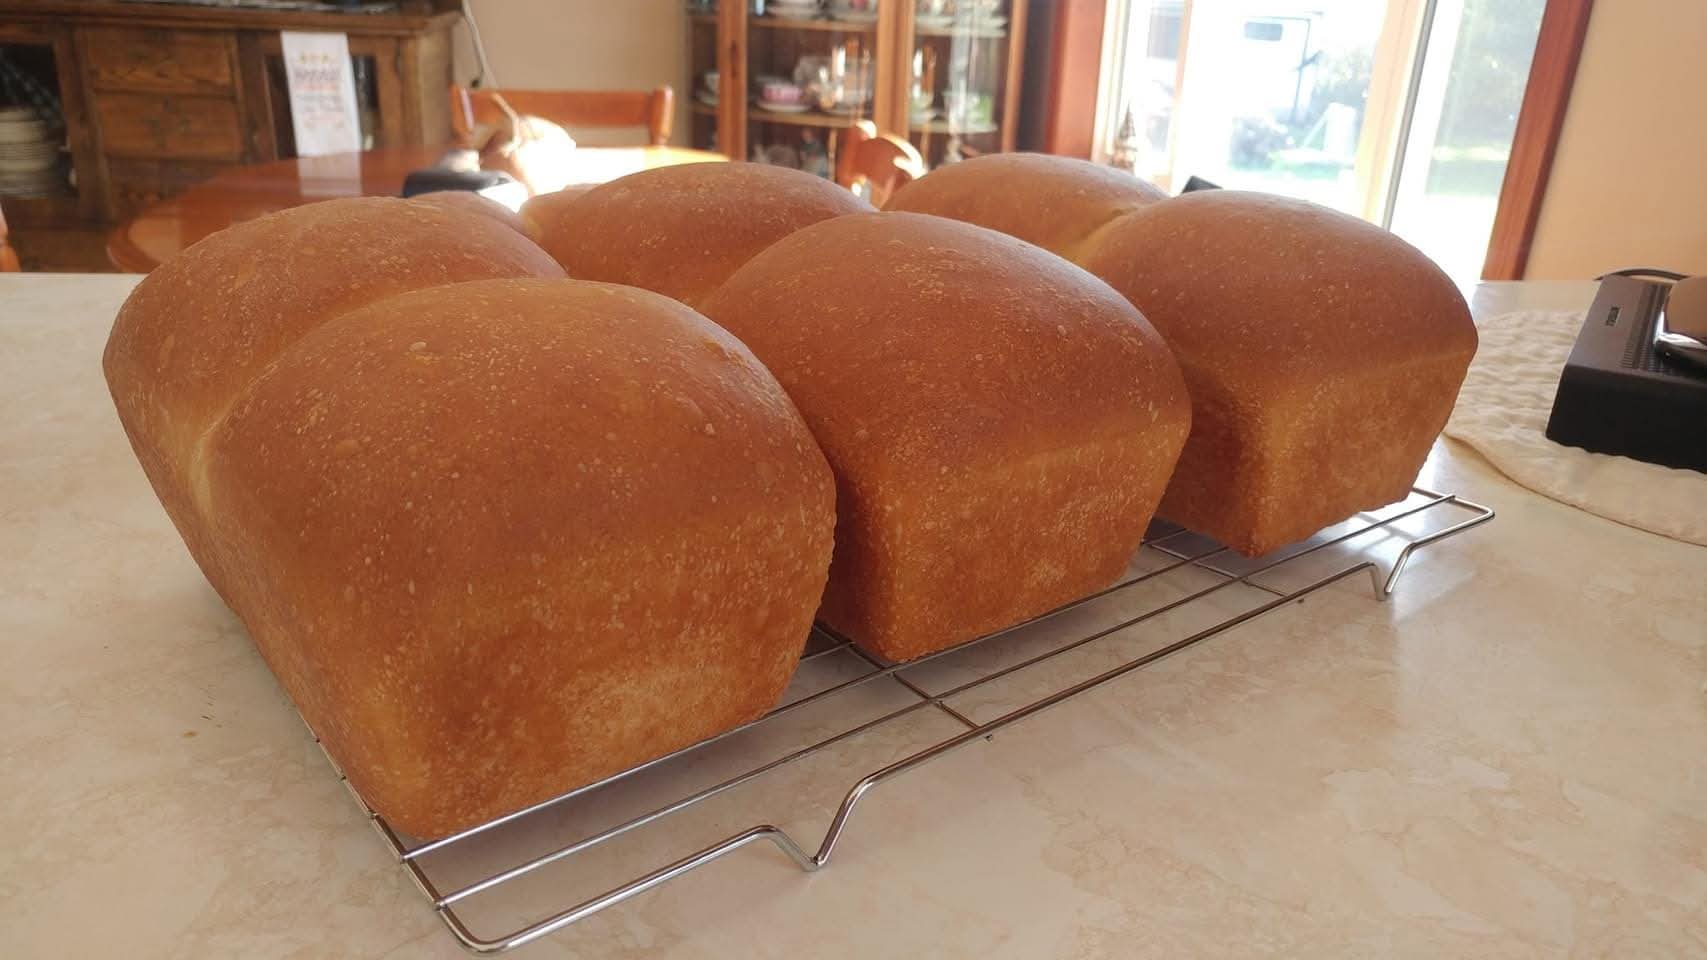
Step 8: Cooling
Once baked, remove the bread from the oven and let it cool in the pan for about 10 minutes. Then transfer it to a wire rack to cool completely. Cooling is important because it allows the interior to set properly, making it easier to slice without squishing the loaf.
Tips for Perfect White Bread
- Use warm water for the yeast, but never boiling—it can kill the yeast.
- Knead the dough enough to develop gluten for a soft and elastic texture.
- Allow sufficient rise time; rushing this step can result in dense bread.
- Check your oven temperature with an oven thermometer to ensure accurate baking.
- Experiment with adding herbs, garlic, or cheese for a flavored twist.
Serving Suggestions
Classic homemade white bread pairs wonderfully with many dishes. You can enjoy it fresh with butter, use it for sandwiches, serve it with soups, or make toast for breakfast. Its versatility makes it an essential staple in any kitchen.
Storage
Store your bread at room temperature in an airtight container or plastic bag for up to 3 days. For longer storage, slice and freeze it. When ready to eat, toast or warm the slices for that fresh-baked feel.
Conclusion
Baking your own white bread is not only satisfying but also gives you a product that is fresh, healthy, and customizable. This classic homemade white bread recipe is simple enough for beginners and yields consistently delicious results. With just a few basic ingredients and a little patience, you can enjoy the comforting taste of homemade bread anytime.
Whether you are baking for your family, preparing sandwiches, or simply enjoying a slice with butter, this bread will become a favorite in your kitchen. The process of mixing, kneading, and watching your bread rise is therapeutic and rewarding. Once you experience the aroma and taste of your own freshly baked bread, store-bought bread may never feel the same again.
Take the time to enjoy the process and savor the results. Homemade bread is more than just food; it’s an experience, a tradition, and a labor of love. So preheat your oven, gather your ingredients, and get ready to create a loaf that is golden, fluffy, and irresistibly delicious. Classic homemade white bread is truly a timeless staple, perfect for every meal, every day.