Old Fashioned Stovetop Fudge
Old fashioned stovetop fudge is more than just a dessert. It is a tradition, a memory, and a reminder of a time when sweets were made slowly, carefully, and with intention. Long before microwave shortcuts and packaged mixes, fudge was crafted on the stovetop using simple ingredients and patient hands. This classic method produces a rich, creamy texture and deep chocolate flavor that modern techniques often fail to replicate.
This blog explores the history, science, and art of old fashioned stovetop fudge. From its humble origins to step-by-step preparation, you will discover why this timeless recipe continues to be loved by generations. Whether you are a beginner or an experienced home cook, understanding the traditional method will elevate your appreciation of this beloved confection.
The History of Old Fashioned Fudge
Fudge has a fascinating history rooted in experimentation and happy accidents. The earliest records of fudge date back to the late nineteenth century in the United States. It is believed that fudge was created when a batch of caramels failed and resulted in a softer, creamier candy. Rather than discarding it, the cook embraced the mistake, and fudge was born.
During the early 1900s, fudge gained popularity at women’s colleges, where students often made it in dormitories using stovetops and shared recipes. These recipes were simple, affordable, and perfect for group cooking. Old fashioned stovetop fudge became a symbol of comfort and creativity, passed down through handwritten notes and family cookbooks.
Unlike modern variations, traditional fudge relied on precise temperature control and physical effort. Candy thermometers were essential, and beating the fudge by hand was a crucial step. This process created the smooth yet firm texture that defines authentic stovetop fudge.
What Makes Stovetop Fudge Different
Old fashioned stovetop fudge differs significantly from quick or shortcut versions. The primary difference lies in the cooking process. Traditional fudge is cooked slowly on the stovetop until it reaches the soft-ball stage, typically around 234 to 240 degrees Fahrenheit. This precise temperature ensures the sugar crystals form correctly.
Another key difference is texture. Properly made stovetop fudge has a smooth, creamy consistency that melts in the mouth without being grainy. This texture is achieved through controlled crystallization, which occurs during cooling and beating. Microwave fudge often lacks this depth and refinement.
Flavor is also a distinguishing factor. Slow cooking allows the sugar, butter, and cocoa or chocolate to blend fully, creating a rich and balanced taste. There are no shortcuts, and each ingredient plays a vital role in the final result.
Essential Ingredients
One of the beauties of old fashioned stovetop fudge is its simplicity. The ingredients are basic, yet when combined correctly, they create something extraordinary. Each component has a specific function and should not be altered carelessly.
Sugar is the foundation of fudge. Granulated sugar is traditionally used because it dissolves evenly and allows precise crystal formation. Milk or cream adds richness and helps dissolve the sugar during cooking.
Butter contributes flavor and smoothness. It also helps prevent excessive crystallization, which can lead to a grainy texture. Cocoa powder or chocolate provides the defining taste, and vanilla extract enhances and rounds out the flavor profile.
Required Tools and Equipment
Making old fashioned stovetop fudge requires a few essential tools. While none are overly complex, each plays an important role in achieving success. Preparation and organization are key before beginning the cooking process.
A heavy-bottomed saucepan is critical for even heat distribution. Thin pans can cause scorching, which ruins the flavor. A candy thermometer is highly recommended to monitor temperature accurately and avoid undercooking or overcooking.
A wooden spoon or heat-resistant spatula is ideal for stirring. Additionally, a square pan lined with parchment paper is commonly used for setting the fudge. Having everything ready before starting helps maintain focus during critical stages.
The Science Behind Perfect Fudge
Understanding the science of fudge-making helps eliminate fear and guesswork. Fudge is essentially a controlled sugar crystallization process. When sugar dissolves in liquid and is heated, it forms a syrup. As the syrup cools, sugar crystals begin to form.
The goal is to create many small crystals rather than a few large ones. Small crystals produce a smooth texture, while large crystals result in graininess. This is why stirring is avoided during boiling and encouraged only after cooling begins.
Beating the fudge at the right moment is crucial. Once the mixture cools to about 110 degrees Fahrenheit, agitation encourages uniform crystal formation. This step transforms the glossy liquid into a thick, matte mixture ready to be poured.
Step-by-Step Preparation
Begin by combining sugar, milk, cocoa, and butter in a heavy saucepan. Heat the mixture slowly over medium heat, stirring gently until the sugar dissolves completely. Avoid scraping the sides of the pan, as undissolved sugar can trigger crystallization.
Once the mixture begins to boil, stop stirring. Attach the candy thermometer and allow the fudge to cook until it reaches the soft-ball stage. This typically takes several minutes, depending on heat and pan size.
Remove the pan from heat and let it cool undisturbed. When the temperature drops, add vanilla extract. Begin beating the mixture steadily until it thickens and loses its glossy sheen. Pour into the prepared pan and allow it to set fully.
Common Mistakes and How to Avoid Them
One of the most common mistakes is stirring during the boiling phase. This introduces sugar crystals that can ruin the texture. Patience is essential during this stage, even if it feels counterintuitive.
Another frequent issue is incorrect temperature. Cooking the fudge too little results in a soft, unset product, while cooking it too long creates hard, crumbly candy. A reliable thermometer greatly reduces this risk.
Beating the fudge too early or too late can also cause problems. Timing matters, and experience improves intuition. If the mixture becomes too thick before pouring, gently warming it may help, though prevention is always better.
Flavor Variations and Additions
While classic chocolate fudge is timeless, old fashioned stovetop fudge serves as a versatile base for creative variations. Nuts such as walnuts or pecans can be folded in just before pouring for added texture.
Other popular additions include marshmallows, peanut butter, or a swirl of caramel. These ingredients should be incorporated carefully to avoid disrupting the structure of the fudge.
Flavor extracts like mint or almond can replace or complement vanilla. When experimenting, it is best to change only one element at a time to maintain balance and consistency.
Storing and Serving Fudge
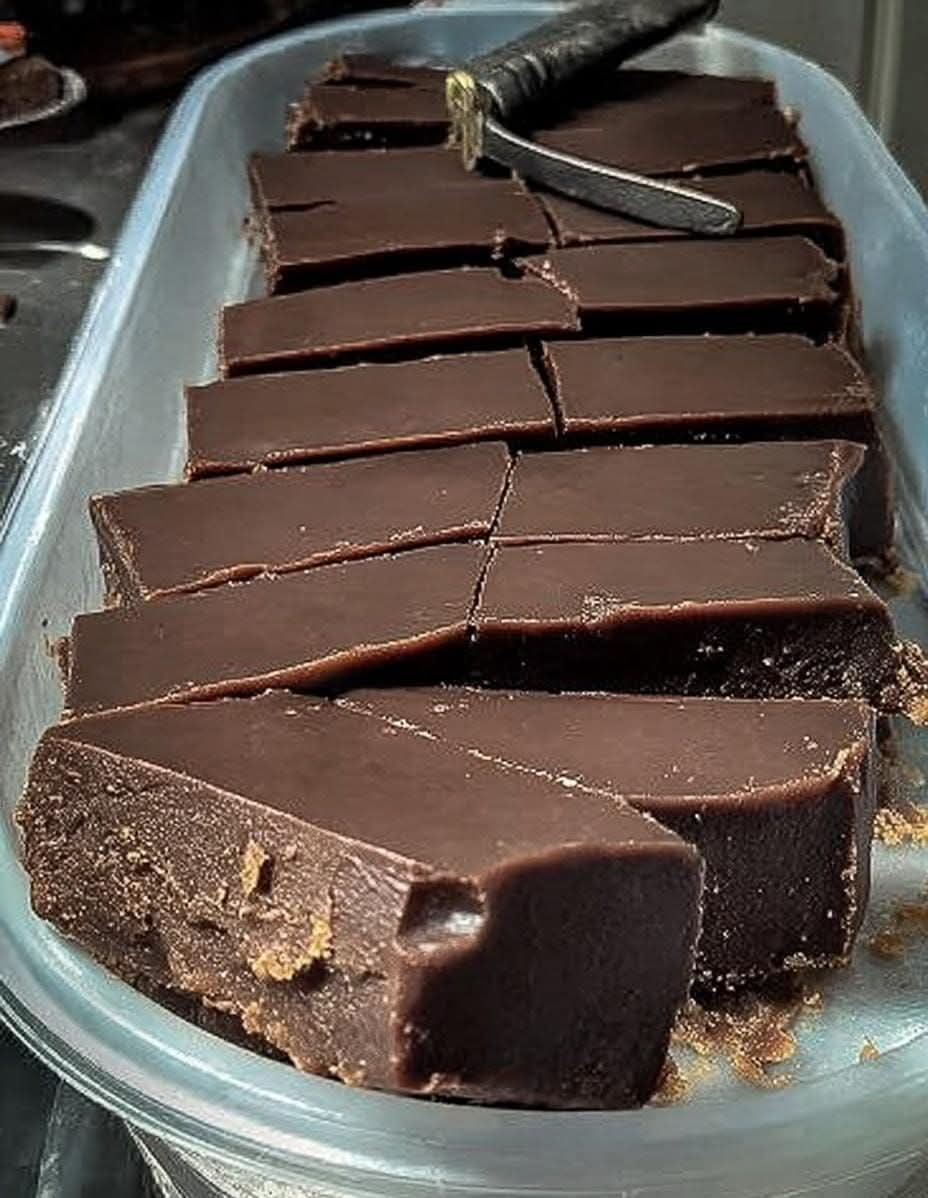
Once set, fudge should be cut into even squares using a sharp knife. Clean the blade between cuts for neat edges. Properly stored fudge maintains its quality for several days.
Fudge can be kept at room temperature in an airtight container. For longer storage, refrigeration is possible, though it may slightly alter the texture. Bringing it back to room temperature before serving restores creaminess.
Old fashioned stovetop fudge is ideal for gifting, holidays, and special occasions. Its nostalgic appeal and rich flavor make it a universally appreciated treat.
Why This Recipe Endures
Old fashioned stovetop fudge endures because it represents care, patience, and craftsmanship. It asks the cook to slow down and engage fully with the process. In return, it offers a depth of flavor and satisfaction that shortcuts cannot replicate.
In a fast-paced world, making fudge the traditional way is almost meditative. Each step matters, and success feels earned. This is why so many families continue to pass down their recipes unchanged.
By mastering old fashioned stovetop fudge, you are not just making candy. You are preserving a culinary tradition that connects generations through taste, memory, and shared experience.