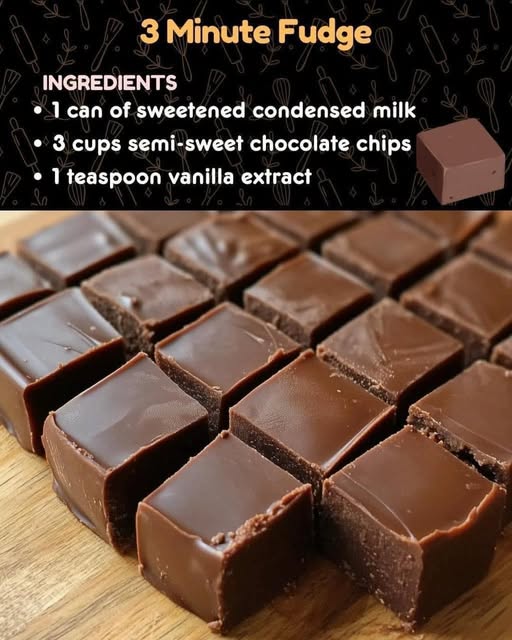
Old-Fashioned Fudge: The Ultimate Guide to a Rich, Creamy, and Foolproof Homemade Candy
When it comes to timeless confections, few treats are as beloved or nostalgic as old-fashioned fudge. This decadent, creamy candy has stood the test of time, offering a melt-in-your-mouth experience that modern variations often fail to replicate. In this comprehensive guide, we’ll walk you through everything you need to know about making rich, creamy, foolproof old-fashioned fudge at home—from traditional techniques and secret tips to mastering the perfect consistency.
What Is Old-Fashioned Fudge?
Old-fashioned fudge is a classic American candy made primarily from sugar, milk, and butter, carefully cooked and beaten to achieve a smooth, firm-yet-creamy texture. Unlike quick microwave versions or recipes using sweetened condensed milk, traditional fudge relies on precise temperature control and timing to develop its characteristic consistency.
This method may require a bit more patience and precision, but the result is a luxuriously rich and authentic fudge that’s worth every minute.
Essential Ingredients for Traditional Fudge
To achieve the signature texture and flavor of old-fashioned fudge, the quality and ratio of ingredients are crucial. Here’s what you’ll need:
- Granulated Sugar – The backbone of fudge, creating structure and sweetness.
- Whole Milk or Heavy Cream – Adds creaminess and prevents crystallization.
- Unsalted Butter – Introduces richness and a silky mouthfeel.
- Salt – Balances sweetness and enhances flavor.
- Pure Vanilla Extract – For classic aroma and depth.
- Optional Add-ins – Chopped nuts, cocoa powder, or peanut butter for variation.
Step-by-Step: How to Make Old-Fashioned Fudge the Right Way
1. Prepare Your Tools
Before starting, assemble all tools:
- Heavy-bottomed saucepan
- Wooden spoon or heat-resistant spatula
- Candy thermometer
- 8×8-inch baking pan (buttered or lined with parchment)
- Mixer or strong arm for beating
2. Combine and Cook
In your saucepan, combine:
- 3 cups granulated sugar
- 1 cup whole milk
- ¼ cup unsalted butter
- Pinch of salt
Stir the mixture continuously over medium heat until the sugar dissolves and the mixture starts to boil.
3. Heat to the Soft Ball Stage
Use a candy thermometer and heat the mixture to 234°F (112°C) — this is known as the soft ball stage. Avoid stirring during this phase, as agitation can cause crystallization.
4. Let It Cool Without Disturbing
Once the desired temperature is reached, remove the pot from heat and let it cool to around 110°F (43°C). Do not stir during this cooling process. This pause allows the sugar crystals to stabilize and set the foundation for a creamy texture.
5. Beat Until Creamy and Thick
Add 1½ teaspoons pure vanilla extract (or any desired flavoring), then begin beating vigorously with a wooden spoon or electric mixer. This is where magic happens—the gloss will fade, and the mixture will become thick and opaque, eventually holding its shape.
6. Pour and Set
Quickly pour the fudge into the prepared pan and smooth the top. Let it cool completely at room temperature for at least 3-4 hours or overnight before cutting into squares.
Common Mistakes to Avoid When Making Fudge
Stirring Too Early
Once the mixture starts boiling, resist the urge to stir. Stirring too early can cause the sugar to crystallize too soon, resulting in a gritty texture.
Skipping the Thermometer
Eyeballing the cooking temperature is risky. Using a candy thermometer ensures you hit the soft ball stage precisely, which is essential for correct texture.
Overbeating or Underbeating
Underbeaten fudge will be runny and not set properly, while overbeaten fudge becomes crumbly. Aim for a thick, matte consistency just before it firms up.
Tips for Perfect Fudge Every Time
- Use a heavy-bottomed pan to prevent burning.
- Do not substitute margarine or low-fat milk—full-fat ingredients are crucial.
- Let it cool undisturbed before beating to avoid premature crystallization.
- For extra smoothness, you can sift the sugar before adding.
- Store fudge in an airtight container at room temperature for up to two weeks, or freeze for longer shelf life.
Fudge Flavor Variations to Try
Old-fashioned fudge is incredibly versatile. Here are some delicious variations:
Chocolate Fudge
Add ½ cup cocoa powder or 4 oz unsweetened baking chocolate during the initial mixing phase.
Peanut Butter Fudge
Replace ¼ cup of butter with smooth peanut butter after removing the mixture from heat.
Maple Walnut Fudge
Swap vanilla extract for maple extract and stir in chopped walnuts before pouring into the pan.
Salted Caramel Fudge
Stir in caramel bits and sprinkle with flaky sea salt before the fudge sets.
Troubleshooting Fudge Issues
| Problem | Cause | Fix |
|---|---|---|
| Fudge is grainy | Stirred too early or overheated | Reheat with a bit of water and rebeat |
| Fudge didn’t set | Undercooked or underbeaten | Reheat, cook to proper temp, and beat again |
| Fudge is dry and crumbly | Overbeaten or cooked too long | Add a tablespoon of cream and gently reheat |
Why Old-Fashioned Fudge Is Worth the Effort
In a world of microwave shortcuts and instant gratification, old-fashioned fudge is a reminder of a time when sweets were an art form. Its rich texture, deep flavor, and satisfying bite simply can’t be mimicked by modern alternatives. Each batch is a labor of love, a sweet tribute to tradition, and a dessert that’s perfect for holidays, gift-giving, or just indulging in a taste of the past.
Whether you’re a beginner or a seasoned candy-maker, mastering this timeless treat is not only rewarding but also endlessly customizable. From chocolate swirls to nutty bites, the possibilities are as rich as the fudge itself.
Final Thoughts
Crafting old-fashioned fudge may require a few extra steps, but the outcome—a velvety, melt-in-your-mouth confection with unmatched depth and texture—is more than worth the effort. With the right ingredients, careful temperature control, and a touch of patience, anyone can recreate this classic candy in their own kitchen.
