My Client Told Me Don’t Worry About the Stove, I’m Going to Replace It. I Told Him Give Me a Minute
When it comes to deep kitchen cleaning, the stove is one of the most neglected yet heavily used appliances. Whether you’re a landlord preparing a rental unit, a tenant wanting your deposit back, or a homeowner tired of built-up grime, knowing how to clean your stove effectively can save time, money, and even relationships. We’ve all been there—the client says, “Don’t worry about the stove, I’m going to replace it.” But a quick decision and the right homemade oven cleaner might just save that appliance—and your reputation.
Why Replacing the Stove Isn’t Always the Best Option
New stoves can cost anywhere from \$500 to over \$2,000, not including delivery or installation. But more often than not, what looks like irreversible grime is just baked-on grease and carbon buildup that can be removed with a simple yet powerful homemade solution. Instead of replacing a perfectly functional stove, let’s bring it back to life with a method that’s eco-friendly, budget-conscious, and incredibly effective.
The Ultimate Homemade Oven Cleaner Recipe
This DIY solution is not only non-toxic and natural, but it also rivals commercial cleaners that contain harsh chemicals. Here’s what you’ll need:
- 1 cup of baking soda
- 1/2 cup of white vinegar
- 1 tablespoon of dish soap
- 2 tablespoons of lemon juice
These common household ingredients combine to form a powerful, natural degreaser and deodorizer that can tackle even the most stubborn stove and oven grime.
Step-by-Step: How to Clean Your Stove with This Homemade Oven Cleaner
Step 1: Remove Grates and Burner Covers
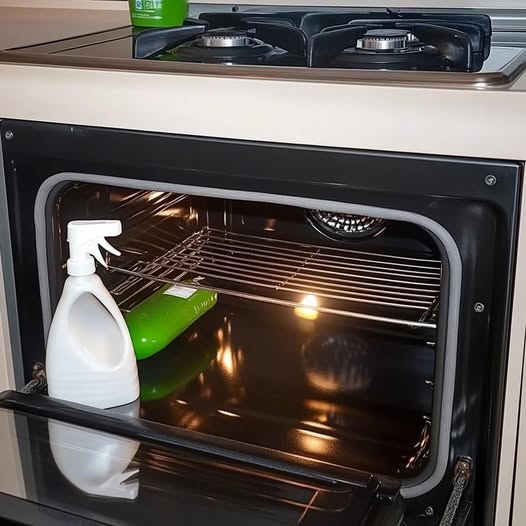
Start by removing all removable components from the stove. Place them in the sink and soak them in hot, soapy water while you work on the stove surface and oven interior.
Step 2: Create the Cleaning Paste
In a bowl, combine the baking soda and dish soap, followed by the lemon juice. The mixture will start to fizz. Gradually pour in the vinegar while stirring to form a smooth, spreadable paste.
Pro Tip: For extra cleaning power, heat the vinegar before adding it—this activates the acidity even more.
Step 3: Apply the Paste Liberally
Use a sponge or old paintbrush to coat the interior of the oven and stove top with the paste. Focus on areas with visible grease, blackened spots, and burnt food residues.
Step 4: Let It Sit
Allow the paste to sit for at least 6-8 hours, or overnight if possible. The longer it stays, the more time the natural acids have to break down the grease and grime.
Deep Cleaning Burners, Grates, and Knobs
While the paste works on the oven and stovetop, return to the burner grates and knobs soaking in the sink. Use a stiff brush or steel wool to scrub away the loosened grease. If stains remain:
- Sprinkle baking soda directly on the grates.
- Spray with white vinegar.
- Let it fizz for 10 minutes.
- Scrub and rinse thoroughly.
Wipe Down and Reveal a Like-New Stove
After allowing the paste to do its magic, use a damp microfiber cloth to wipe away the dried cleaner. You may need to do several passes with clean water to remove all residue. For a final shine, spray a bit of vinegar-water mix and buff with a dry cloth.
Tackling Tough Spots: Extra Cleaning Hacks
Some grime may be extra stubborn, especially around burner rings and oven doors. Here are some additional tips:
- Razor blade scraper: Carefully use this on flat glass stove tops to remove burnt-on gunk.
- Lemon halves dipped in salt: Scrub the inside of the oven door for a citrus-powered polish.
- Toothbrush + baking soda paste: Ideal for crevices and corners around knobs.
Why This Method Works So Well
Each ingredient plays a vital role in this natural oven cleaning formula:
- Baking soda: A gentle abrasive that breaks up food and grease.
- White vinegar: Dissolves grime and kills bacteria.
- Dish soap: Cuts through oily layers.
- Lemon juice: Natural acid and deodorizer.
Together, they create a chemical-free cleaning system that’s safe for homes with pets, children, or sensitivities.
Client Was Ready to Replace the Stove — Here’s What Happened Instead
When the client said “I’m going to replace it,” we almost gave in. But we asked for just one minute—literally.
We whipped up this cleaner in less than five minutes, applied it, and returned the next morning. The transformation was shocking. The baked-on gunk lifted like magic, the surface sparkled, and the client? They were thrilled to save thousands on a new appliance.
We walked away not just with a clean stove, but with a happy client and a glowing referral.
Maintenance Tips to Keep Your Stove Spotless Year-Round
- Wipe spills immediately after cooking to prevent them from baking on.
- Use silicone burner liners to catch drips and crumbs.
- Clean with the baking soda-vinegar paste once a month for routine maintenance.
- Keep a spray bottle of vinegar and water nearby for quick daily touch-ups.
Why Professionals Use Homemade Oven Cleaners
Many cleaning professionals prefer this method because it’s:
- Cost-effective
- Non-toxic
- Environmentally friendly
- Incredibly effective on old and new grime alike
Whether you’re in property management, cleaning services, or just a savvy homeowner, using this method can save time, money, and appliances.
Final Thoughts: Don’t Replace It, Revive It
Before you or your client make the costly decision to replace a stove, remember: most stoves just need a deep clean. This homemade solution has helped us rescue dozens of “unsalvageable” appliances.
So next time someone says “don’t worry about the stove, I’m going to replace it,” just smile and say, “Give me a minute.”