Christmas Cherry Bars – A Festive, Fruity Holiday Favorite
There’s something magical about the holiday season—the twinkling lights, the scent of pine in the air, and of course, the sweet treats that bring everyone together. Among the many beloved Christmas desserts, few capture the essence of the holidays quite like Christmas Cherry Bars. These buttery, soft cookie bars are layered with vibrant cherry pie filling and topped with a delicate almond glaze, making them a must-have on every cookie tray and dessert table.
Perfect for holiday parties, cookie exchanges, or just a cozy night by the fire, Christmas Cherry Bars are not only visually stunning but incredibly easy to make. With simple pantry staples and just a few steps, you can create a dessert that tastes as festive as it looks.
Why Christmas Cherry Bars Deserve a Spot on Your Holiday Table
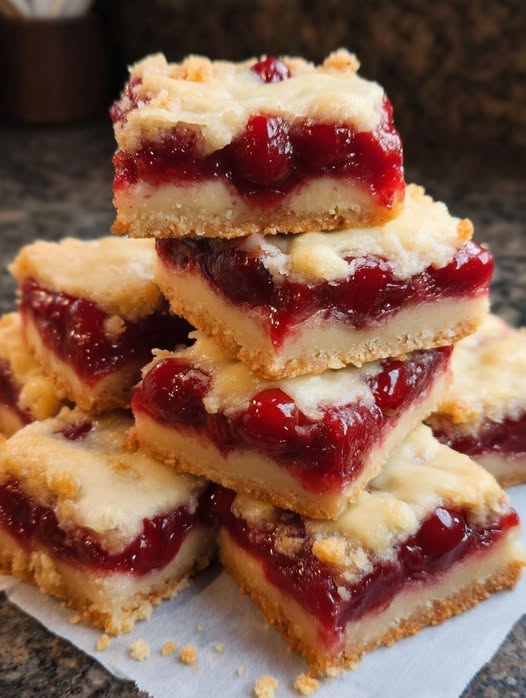
The charm of these cherry bars lies in their perfect balance of textures and flavors. The base layer is a soft, sugar cookie-like dough that’s buttery and lightly sweet. Nestled in the middle is a luscious cherry filling—tart yet sweet, and bursting with flavor. The bars are then finished with a drizzle of almond glaze, adding a touch of elegance and a subtle nutty aroma that perfectly complements the cherry.
Whether you’re building a festive dessert platter or searching for the ideal make-ahead holiday treat, these bars are guaranteed to impress.
Ingredients for Christmas Cherry Bars
For the Bars:
- 1 cup unsalted butter, softened
- 2 cups granulated sugar
- 1 teaspoon salt
- 4 large eggs
- 1 teaspoon vanilla extract
- ¼ teaspoon almond extract
- 3 cups all-purpose flour
- 2 cans (21 oz each) cherry pie filling
For the Glaze:
- 1 cup powdered sugar
- ½ teaspoon vanilla extract
- ½ teaspoon almond extract
- 2–3 tablespoons milk (adjust for consistency)
Step-by-Step Instructions to Make Christmas Cherry Bars
Step 1: Preheat the Oven
Preheat your oven to 350°F (175°C) and lightly grease a 15×10-inch jelly roll pan or line it with parchment paper for easy removal.
Step 2: Make the Dough
In a large mixing bowl, cream together the softened butter and sugar until light and fluffy—about 2-3 minutes. Add in the salt, eggs, vanilla, and almond extract, and mix until fully combined. Gradually beat in the flour, a little at a time, until a smooth, soft dough forms.
Step 3: Assemble the Bars
Spread two-thirds of the dough evenly into the prepared pan using a spatula or lightly floured hands. Make sure it reaches all corners of the pan and forms a level base.
Spoon the cherry pie filling evenly over the dough, spreading it out so every bite gets a taste of cherry.
With the remaining dough, drop small spoonfuls over the top of the cherry layer. It won’t cover the filling completely—that’s okay! The red cherries peeking through add a festive touch.
Step 4: Bake to Perfection
Bake the bars in the preheated oven for 35–40 minutes, or until the top is lightly golden and the edges are set. The filling will bubble slightly.
Allow the bars to cool completely in the pan before glazing. This step is important for clean slicing and proper glaze setting.
Step 5: Make the Almond Glaze
In a small bowl, whisk together the powdered sugar, vanilla extract, almond extract, and milk. Start with 2 tablespoons of milk and add more as needed to reach your desired drizzling consistency.
Use a spoon or fork to drizzle the glaze over the cooled bars in a zigzag pattern.
Step 6: Slice and Serve
Once the glaze has set, cut the bars into squares or rectangles. You’ll get around 36 bars, depending on your preferred size.
Tips for the Best Christmas Cherry Bars
✔ Use Quality Cherry Filling
Opt for premium cherry pie filling with whole cherries and fewer fillers. It adds more flavor and a better texture.
✔ Chill Before Cutting
For the cleanest slices, refrigerate the bars for 30 minutes after glazing. This helps them firm up and makes cutting easier.
✔ Customize the Flavor
Not a fan of almond extract? You can replace it with more vanilla or even try lemon extract for a citrusy twist.
✔ Make Ahead Friendly
These bars keep well for up to 5 days in an airtight container, making them perfect for holiday prep.
Variations to Try
While traditional cherry bars are hard to beat, you can get creative with these fun twists:
- Chocolate Cherry Bars: Add mini chocolate chips to the dough or drizzle with melted chocolate instead of glaze.
- Nutty Delight: Sprinkle chopped toasted almonds or pecans over the top before baking for added crunch.
- Berry Swap: Try with blueberry or raspberry pie filling for a different fruity flavor.
How to Store Christmas Cherry Bars
- Room Temperature: Store in an airtight container for up to 3 days.
- Refrigerator: Lasts 5–6 days chilled. Bring to room temp before serving.
- Freezer: Freeze unglazed bars for up to 2 months. Thaw overnight and glaze before serving.
Perfect Pairings for Cherry Bars
- Hot Chocolate or Mulled Wine – Rich drinks pair perfectly with the sweet and tart cherry filling.
- Vanilla Ice Cream – A scoop on the side transforms a bar into a full dessert.
- Espresso or Dark Roast Coffee – Cuts through the sweetness and complements the buttery base.
Why You’ll Love These Bars
- Festive and eye-catching with their bright cherry topping
- Soft and buttery base that melts in your mouth
- Simple ingredients and easy prep
- Perfect for holiday gifting, potlucks, or dessert trays
- Customizable with your favorite flavors or fillings
Whether you’re baking for a crowd or just treating your family, these Christmas Cherry Bars are the perfect blend of sweet nostalgia and seasonal cheer.