Homemade Crunch Bars – Just 3 Ingredients for the Ultimate No-Bake Treat
Craving something sweet, crunchy, and chocolatey without spending hours in the kitchen? These Homemade Crunch Bars are your new go-to dessert. Made with just 3 simple ingredients, they’re the perfect no-bake treat for busy weekdays, late-night snacking, or satisfying a sweet tooth in minutes. No baking, no fancy tools, no stress—just pure chocolate crunch bliss.
Whether you’re making them for yourself, packing them into lunchboxes, or whipping up a quick party treat, these bars will impress with their rich taste and irresistible texture.
Why You’ll Love These 3-Ingredient Crunch Bars
- ✅ Only 3 ingredients – No pantry overload!
- ✅ Ready in minutes – Melt, mix, and chill.
- ✅ No oven needed – Perfect for hot days or lazy baking.
- ✅ Kid-friendly – Fun to make and even more fun to eat.
- ✅ Customizable – Add your favorite toppings or mix-ins!
These bars are a homemade version of the classic Nestlé Crunch Bar, but even better because they’re fresher, richer, and can be tailored to your taste.
Ingredients You’ll Need
Here’s what you need to make the easiest chocolate crunch bars ever:
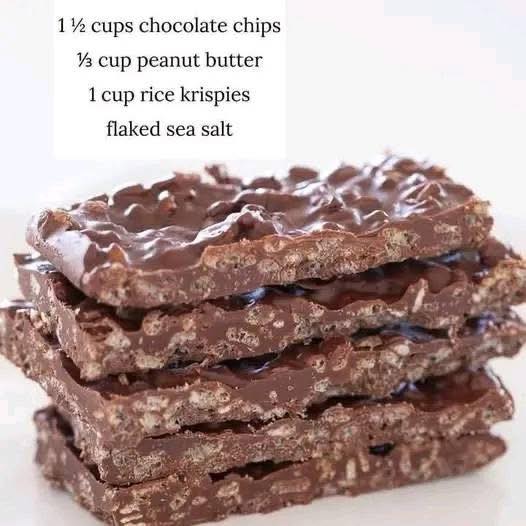
- 2 cups (12 oz) chocolate chips – Use milk, dark, or semi-sweet depending on your preference
- 1 ½ cups crispy rice cereal (like Rice Krispies)
- 1 tablespoon coconut oil or butter – Optional, but it helps melt the chocolate smoothly and adds shine
Pro Tip: Use high-quality chocolate for the best flavor. Dark chocolate adds a more intense, less sweet taste, while milk chocolate gives you a classic candy bar feel.
How to Make Homemade Crunch Bars (Step-by-Step)
Step 1: Melt the Chocolate
Place your chocolate chips (and coconut oil or butter, if using) in a microwave-safe bowl. Microwave in 30-second intervals, stirring between each round until smooth and fully melted.
Alternatively, you can use a double boiler on the stovetop for more controlled melting.
Step 2: Stir in the Cereal
Once the chocolate is melted and smooth, gently fold in the crispy rice cereal. Stir until all of the cereal is evenly coated in chocolate.
Make sure not to crush the cereal while mixing—you want those crispy pockets in every bite!
Step 3: Spread and Set
Line an 8×8-inch baking pan with parchment paper or foil for easy removal.
Pour the mixture into the pan and spread it evenly with a spatula. Press down gently to compact the mixture without crushing the cereal.
Place the pan in the refrigerator for 30–45 minutes, or until fully set.
Step 4: Slice and Serve
Once chilled and firm, lift the mixture out of the pan using the parchment. Cut into squares or bars, and enjoy!
Store leftovers in an airtight container in the fridge for up to 1 week or freeze for longer storage.
Optional Add-Ins & Variations
While these bars are perfect as-is, you can easily customize them with fun mix-ins or toppings:
🍫 Chocolate Variations
- Use white chocolate, dark chocolate, or a combo for a layered effect
- Add a drizzle of melted peanut butter or caramel over the top
🥜 Nutty Crunch
- Mix in chopped almonds, peanuts, or hazelnuts
- Add a spoonful of peanut butter to the melted chocolate for a rich twist
🍬 Sweet Extras
- Mini marshmallows for a s’mores-like version
- Crushed pretzels for a salty-sweet combo
- Sprinkles or M&Ms for a kid-friendly fun look
Want to make them healthier? Use dark chocolate and a whole grain puffed rice cereal or brown rice crisps for a slightly better-for-you treat.
Tips for the Best Homemade Crunch Bars
✅ Use parchment or foil – It makes removal and slicing clean and easy.
✅ Cool completely before slicing – Warm bars will crumble.
✅ Don’t overheat the chocolate – Stir gently and melt slowly for smooth texture.
✅ Make ahead for parties – These bars can be made several days in advance!
Perfect for Every Occasion
These 3-ingredient crunch bars aren’t just quick and easy—they’re also super versatile. Great for:
- Holiday trays and cookie exchanges
- Lunchbox treats
- Movie night snacks
- Midday coffee breaks
- Birthday parties or bake sales
They’re also a great starter recipe for kids learning to cook!
Frequently Asked Questions
❓ Can I use puffed rice instead of crispy rice cereal?
Yes, but the texture will be lighter and less crunchy. For that classic candy-bar texture, stick to crispy rice cereal.
❓ Can I make these dairy-free?
Absolutely. Use dairy-free chocolate chips and plant-based butter or coconut oil for a fully vegan version.
❓ Do they need to be refrigerated?
Not necessarily. If your kitchen is cool, they can stay at room temperature in an airtight container. For firmer texture, refrigeration is ideal.
❓ Can I double the recipe?
Yes! Just use a 9×13-inch pan for a larger batch and increase chill time slightly.
Final Thoughts
When it comes to quick homemade desserts, it doesn’t get much better than these 3-ingredient Homemade Crunch Bars. With minimal effort and ingredients you likely already have, you can whip up a batch of crunchy, chocolatey goodness that rivals any store-bought candy bar.
It’s the ultimate treat to keep on hand when those chocolate cravings strike—and once you try them, we guarantee you’ll be making them again and again.