Homemade Crunch Bars
Homemade Crunch Bars are one of those nostalgic treats that instantly transport you back to childhood. They’re sweet, crisp, and wonderfully simple, combining smooth chocolate with the delicate crunch of puffed rice. Making them at home is not only easy but also incredibly satisfying. You get full control over the flavor, texture, and ingredients, allowing you to create a cleaner, fresher, and more delicious version than anything store-bought.
In this blog, we’ll explore everything you need to know about Homemade Crunch Bars—from their history to tips, ingredient breakdowns, variations, troubleshooting, serving ideas, storage methods, and a detailed step-by-step recipe. This article is written in clear HTML format, organized with headings and comfortable paragraphs so you can easily copy and use it on a blog or website.
What Are Homemade Crunch Bars?
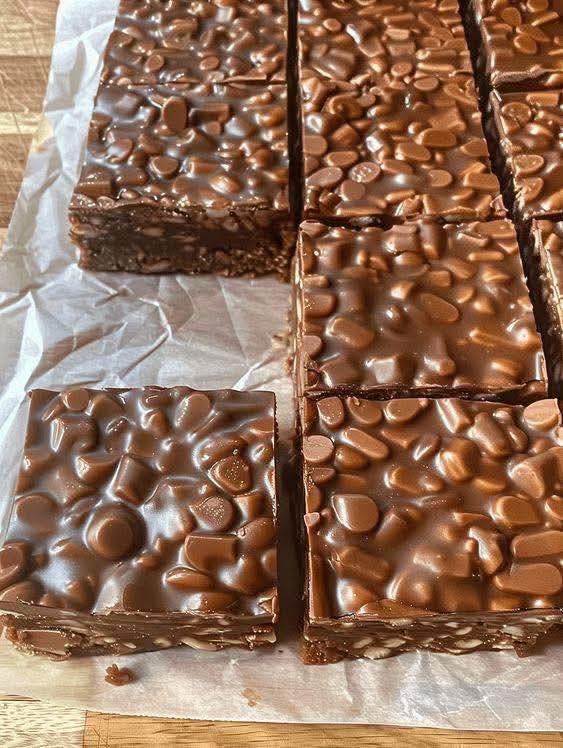
Crunch bars are classic chocolate candy bars made with puffed rice cereal mixed into melted chocolate. The result is a light, crispy, and sweet bar with a delightful bite. Homemade versions replicate the famous commercial bar but without additives or preservatives. You can also customize the sweetness, chocolate type, and add-ins according to your preference.
These bars require minimal ingredients and no baking, which makes them perfect for beginners, busy families, dessert lovers, or anyone craving something simple but satisfying. The process involves melting chocolate, mixing the cereal, spreading the mixture in a pan, and letting it set. That’s it—easy, fast, and irresistibly good.
Why You Will Love These Crunch Bars
There are countless reasons why Homemade Crunch Bars have become a favorite treat for so many people. They hit the perfect balance of sweet, crunchy, and smooth textures. They’re fun to make, easy to customize, and ideal for gifting or snacking.
These bars are also great for kids’ lunchboxes, parties, holiday trays, or quick dessert fixes. They take only minutes to prepare and require no special tools. You can prepare a big batch, store it, and enjoy these delicious bites whenever you’re craving something sweet.
Main Ingredients Used in Homemade Crunch Bars
The beauty of this recipe lies in its simplicity. You only need two essential ingredients, and everything else is optional. Let’s take a closer look at what you’ll be using:
Chocolate
Choose high-quality chocolate for the best results. You can use:
- Milk chocolate for classic sweetness
- Semi-sweet chocolate for a richer taste
- Dark chocolate for a deeper, slightly bitter flavor
- White chocolate for a unique twist
Chocolate chips, bars, or baking chocolate all work well. Just make sure it melts smoothly.
Puffed Rice Cereal
The signature crunch comes from puffed rice. It is light, airy, and stays crisp when coated in chocolate. You can use:
- Regular puffed rice cereal
- Crisped rice cereal
- Organic puffed rice with no added sugar
Make sure the cereal is dry and fresh for maximum crunch.
Optional Add-Ins
If you want to upgrade your bars, consider adding:
- Peanut butter
- Nutella or hazelnut spread
- Sea salt
- Caramel bits
- Toasted nuts
- Mini marshmallows
- Vanilla extract
- Shredded coconut
These additions can add new layers of flavor and texture, making your homemade bars even more exciting.
How to Make Homemade Crunch Bars
Once you understand the simple steps, you’ll want to make these bars again and again. Here is a complete method that results in perfect Crunch Bars every time.
Step 1: Prepare Your Pan
Line an 8×8 or 9×9 inch square pan with parchment paper. This makes it easier to lift the bars once they have set. Leave some extra parchment hanging from the sides so you can pull the block of chocolate out smoothly.
Step 2: Melt the Chocolate
Place your chocolate in a microwave-safe bowl. Heat in 20-second intervals, stirring between each, until fully melted and smooth. You can also use the double-boiler method if preferred. Be careful not to overheat the chocolate.
Step 3: Add the Puffed Rice
Once the chocolate is melted, gently fold in the puffed rice cereal using a spatula. Make sure the cereal is fully coated so every bite has the perfect balance of chocolate and crunch.
Step 4: Spread the Mixture
Pour the chocolate mixture into your prepared baking pan. Spread it evenly using a spatula. Press down gently so the bars hold together but do not crush the cereal.
Step 5: Let It Set
Place the pan in the refrigerator for at least 1 hour or until firm. Once set, lift the bars from the pan using the parchment paper and cut into squares or rectangles.
Helpful Tips for Perfect Crunch Bars
To make sure your bars turn out perfectly every time, here are some helpful tips:
- Use good chocolate to avoid grainy texture.
- Don’t add too much cereal—too much will make the bars fall apart.
- If adding peanut butter, reduce chocolate slightly for proper consistency.
- Refrigerate long enough for a clean cut.
- Store in a cool place to prevent melting.
Following these suggestions ensures your bars remain crisp, clean, and delicious.
Flavor Variations
This recipe is extremely flexible. You can create endless variations to match your taste preferences or holiday themes.
- Peanut Butter Crunch Bars: Add creamy peanut butter to the chocolate.
- Dark Chocolate Sea Salt Bars: Sprinkle sea salt on top before chilling.
- White Chocolate Raspberry Bars: Add freeze-dried raspberries.
- Caramel Swirl Crunch Bars: Drizzle caramel sauce on top.
- Mint Chocolate Bars: Add a drop of peppermint extract.
- S’mores Crunch Bars: Add mini marshmallows and graham pieces.
How to Store Homemade Crunch Bars
To keep your bars fresh and crisp, follow these storage recommendations:
- Store in an airtight container.
- Keep in the refrigerator for up to 2 weeks.
- Freeze for up to 3 months.
- Separate layers with parchment so they don’t stick.
When frozen, let the bars sit at room temperature for a few minutes before eating.
Serving Ideas
Crunch Bars are versatile treats that can be served in many fun ways:
- Cut into small squares for party trays.
- Serve large bars as lunchbox desserts.
- Wrap individually for gifting.
- Crumble over ice cream.
- Add to s’mores boards for a twist.
Frequently Asked Questions
Can I use white chocolate?
Yes! White chocolate works beautifully and creates a sweeter, creamier bar.
My bars turned out too soft. What happened?
They may have too much cereal or not enough chilling time.
Can I make these dairy-free?
Use dairy-free chocolate and ensure the cereal is dairy-free as well.
Do I need to cook or bake anything?
No baking is required—just melt, mix, and chill.
Final Thoughts
Homemade Crunch Bars are the perfect example of how simple ingredients can create something incredibly delicious. They’re quick, fun to prepare, and endlessly customizable. Whether you’re making them for yourself, your family, or to share with friends, these bars are guaranteed to bring joy with every bite.
Try different flavors, cut them into fun shapes, or wrap them as gifts—there’s no wrong way to enjoy these delightful homemade treats. Once you try them, they will become a permanent favorite in your kitchen.